
All of the following information is available in a WORD file or a PDF file that can be downloaded via the buttons below.
- Sliding Compound Mitre Saw
- Table Saw
- Planer
- Jointer
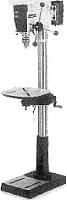
- Drill Press
- Compressor/Pneumatic Nailer
- Biscuit Joiner
- Circular Saw
- Band Saw
- Bench Grinder
- Cordless/Corded Hand Drill
- Palm Sander
- Router
- Scroll Saw
- Jigsaw
- Wood Lathe
Sliding Compound Mitre Saw Safe Operating Procedures

1. Operate only after you have received instruction.
2. Remove any jewellery, secure loose clothing, and confine long hair.
3. Make sure all guards are in place and operating correctly.
4. Always use personal protective equipment (PPE).
5. All materials should be inspected for defects such as warps, knots and foreign objects.
6. Make all blade changes and angle adjustments with the power supply to the sliding compound mitre saw disconnected.
7. Hold the stock firmly against the fence and the table keeping your fingers at least 150 mm (6″) away from the blade.
8. Allow the blade to reach full operating speed before letting the blade enter into the stock.
9. Be aware that the saw moves up or down slightly upon start-up and stopping.
10. Ensure that the saw is in the full up and back position when starting and in the full down and back position when stopping.
11. When finished tum off the sliding compound mitre saw and wait for the blade to come to a complete stop before retracting from the work piece.
12. Disconnect the sliding compound mitre saw from the power source before beginning clean-up procedures.
13. When cutting anything larger than a 2 x 8 (2 x 6 at 45° mitre) use an outdown-back motion with the rail lock knob loosened. Pull the saw out, toward you, lower the saw head down toward the work piece, and slowly push the saw back to complete the cut. Do not allow the saw to contact the top of the work piece while pulling out. The saw may run toward you, possibly causing personal injury or damage to the work piece.
14. Do not perform any operation freehand and ensure small pieces are properly secured.
15. Never hold work piece on the right side of the blade with left hand or vice versa. This is called cross-armed cutting and exposes the user to serious injury.
16. Return carriage (cutter head) to its full rear position after each cross-cut.
17. If the blade begins to bind while cutting stop immediately.
18. Only install clean, sharp, cross-cut type blades in the sliding compound mitre saw.
19. Make certain the blade rotates in the correct direction and that the teeth at the bottom of the blade are pointing to the rear of the mitre saw.
20. After changing a blade, you should ensure the saw is turned off, the blade moves freely, and the guard is functioning properly before plugging in the saw.
21. Install a new table kerf plate if the current one is damaged or excessively cut.
22. Do not reach around, behind or underneath the saw unless it is turned off and unplugged.
23. Do not cut ferrous metals or any masonry.
Sliding Compound Mitre Saw User Safety Test
Name_______________________________________Date:___________________________
Instructions: Circle the letter next to the most correct answer
1. What is proper dress when operating a compound mitre saw?
Circle all that apply
a. remove any jewellery
b. secure loose clothing
c. confine long hair
d. all of the above
2. When should Personal protective equipment (PPE) be worn to operate the compound mitre?
a. sometimes
b. never
c. always
d. none of the above
3. What must be done before changing the blade or performing any other maintenance on the compound mitre saw?
a. turn off the machine
b. turn off the machine and disconnect the machine from the power source
c. ensure the saw arm is in the down, locked position
d. keep the safety guard in place
4. What checks should be made after changing the blade on the compound mitre saw?
Circle all that apply
a. rotate the blade completely by hand before plugging in the machine
b. be sure the switch is in the off position before inserting the plug into the outlet
c. ensure that the safety guard is in place and operating correctly
d. ensure that the teeth at the bottom of the blade are pointing away from the fence
5. What checks should be made after changing the blade on the compound mitre saw?
Circle all that apply
a. rotate the blade completely by hand before plugging in the machine
b. be sure the switch is in the off position before inserting the plug into the outlet
c. ensure that the safety guard is in place and operating correctly
d. ensure that the teeth at the bottom of the blade are pointing away from the fence
6. When finished cutting stock on the compound mitre, what should be the next step?
a. turn off the saw and wait until the machine has come to a complete stop before unplugging
b. leave your debris and off cuts lying around
c. leave the saw immediately d. all of the above
7. What is the correct type of blade for the compound mitre saw?
a. a cross-cut blade
b. any diameter blade
c. a dull and dirty blade
d. a blade missing teeth
8. While cutting, when can you safely start and stop a compound mitre saw?
a. in the full up position
b. in the full clown position
c. starting in the full up position and stopping in the full down position
d. in the half way position
9. When cutting using the sliding feature which of the following rules must be followed?
a. start the cut from the back of the saw
b. start the cut with the blade contacting the work piece
c. start the cut from the full out and up position, lower the saw, and push the saw back slowly to complete the cut
d. start the cut from the full out and down position and push the saw back slowly to complete the cut
Table Saw Safe Operating Procedure
1. Operate only after you have received instruction.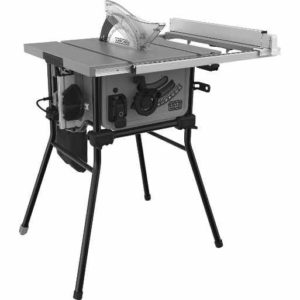
2. Remove jewellery, secure loose clothing, and confine long hair.
3. Make sure all guards are in place and operating properly.
4. Always use personal protective equipment (PPE).
5. Turn machine off and disconnect from power source before installing or removing accessories, before adjusting or changing set-ups, when making repairs or inspecting, or cleaning the work area.
6. Inspect the blade before operation. Check for warping, cracks, teeth missing and that proper blade is in place.
7. All materials should be inspected for defects such as warps, knots and foreign objects.
8. Never start the machine with the stock touching the blade.
9. Never perform layout or setup work on the table saw.
10. Always use guards, splitter, and anti-kickback pawls whenever possible.
11. Remove debris before start-up and when you are finished with power off.
12. Always use the ripping fence or the cut-off guide (mitre gauge). You must use one or the other…never freehand. You can never use both at the same time unless you use a “clearance block”.
13. Stand to one side of the saw while operating. If a board kicks back from binding it will not hit you if you are to one side of the saw. (Never have any part of your body in line with the blade)
14. Keep hands and fingers away from the blade. Never attempt to free a stalled saw blade without first turning the machine off.
15. Avoid kickback by:
a. keeping the blade sharp;
b. keeping the rip fence parallel to the blade;
c. using guard and splitter for every possible operation;
d. pushing the stock pass the saw blade before release;
e. never rip a piece of stock that is twisted, warped or does not have a straight edge to guide along the fence;
f. never saw a large piece of stock that cannot be controlled;
g. use a feather board when anti-kickback pawls cannot be used; and
h. never rip a piece of stock that is shorter than 10″.
16. To ensure safety set the saw blade 6mm (1/4″) above the stock when cutting.
17. Always use the proper blade designed for different operations… example a ripping blade for ripping material.
18. Always turn the blade down to the lowest position when finished.
19. Always use a push stick when the fence is set under 75mm (3″) to the blade.
20. Only cut materials intended for cutting on the table saw (i.e. hardwood, softwood, plywood, OSB, other wood products, plastics).
Table Saw Safety Test
Name:__________________________________________________Date:_________________________________
Instructions: Circle the letter next to the most correct answer
1. How far above the stock to be cut should you set the saw blade?
a. 13mm (1/2″)
b. 6mm (1/4″)
c. 25mm (1″)
d. 19mm (3/4″)
2. What equipment is found on a safe table saw? Choose all that apply
a. splitter
b. guard
c. anti-kickback device
d. table inset
3. Which type of material can be cut using the table saw?
a. metal
b. softwood
c. hardwood
d. both b and c
4. Which operation should be performed when using the table saw?
a. cross cutting with a mitre gauge and fence at the same time
b. cutting while having the mitre gauge or fence in place
c. freehand cutting
d. ripping material without the fence
5. What should we do before operating the table saw?
a. get teachers permission
b. pass safety test with a score of I 00% grade
c. view the demonstration by the teacher
d. all of the above
6. What should you do to avoid kickback?
a. keep the saw blade parallel to the rip fence
b. cut freehand
c. saw a piece of stock with knots, nails, or other foreign objects
d. use a dull blade with missing teeth
7. What should a student do before starting the table saw? Choose all that apply
a. inspect the blade
b. have the stock touching the blade
c. inspect the piece of stock
d. ensure proper safety equipment is in place
8. Which one of the following statements is true?
a. always start the machine with the stock touching the blade
b. always attempt to free a stalled saw blade without first turning the machine off
c. always perform layout on the table saw
d. use the correct blade for the intended operation
9. What is the distance between the fence and the blade where the use of a push stick is indicated?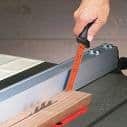
a. 150 mm (6″)
b. 300 mm (12″)
c. 75 mm (3″)
d. none of the above
10. What is the order of things to do when leaving the table saw after you have finished?
a. clean up debris, unplug the machine, lower the blade
b. unplug the machine, lower the blade, clean up debris
c. lower the blade, unplug the machine, clean up debris
d. clean up debris, lower the blade, unplug the machine
Planer Safe Operating Procedures

1. Operate only after you have received instruction.
2. Remove jewellery, eliminate loose clothing, and confine long hair.
3. Make sure all guards are in place and operating properly.
4. Always use Personal Protection Equipment (PPE”s) ie. Face shield, ear protection etc.
5. All materials should be inspected for defects such as warps, knots and foreign objects.
6. Make all adjustments with the power off and cord unplugged.
7. Keep knives sharp and free from rust and pitch. Dull or rusted knives work harder and can cause kickback
8. When planing bowed stock, place the concave (cup down) side of the stock on the table and cut with the grain to prevent kickback.
9. Thin stock, of 6 mm (1/4″), should be properly supported by a jig or back up board.
10. The minimum length of material is 300 mm (12″)
11. The maximum depth cut of material is 3 mm (1/8″). (dependent on material width, this is only recommended for boards of 150 mm (6″) width or less)
12. The proper depth of cut and rate of speed is related to the material being planed.
13. Do not force stock through the planer. Keep hands off the material & let the power feed operate.
14. Allow the cutterhead to reach full speed before feeding a workpiece into the machine Changing speeds while planing can cause kickback.
15. Do not stand directly in front of the machine while it is in operation, the possibility of kick back exists.
16. Never look directly into the throat of a planer at table level while it is running or in operation.
17. Keep hands 150 mm (6″) away from the cutterhead carriage when feeding workpiece.
18. Remove shavings or chips when the power is turned off. Keep hands away from the chip guard and the point of operation.
19. When finished job turn off planer, make sure cutter head has stopped and clean workspace.
20. If wood gets stuck turn “OFF” the planer. Do not use your hand to clear the blockage ask your instructor for assistance.
Planer Safety Test
Name:___________________________ Date:____________________
Instructions: Circle the letter next to the most correct answer
1. Which statement is true?
a. Keep knives sharp and free from rust and pitch. Dull or rusted knives work harder and can cause kickback.
b. There is no minimum thickness of stock that can be planed safely.
c. The power does not have to be turned off to remove chips or shavings
d. You can stand directly in front of the machine because kickback will not occur with this device.
2. What should the user do when choosing stock to be planed?
a. not worry too much about stock condition
b. choose short stock under 300 mm (12″) in length
c. check material for loose knots, nails and other foreign objects
d. all of the above
3. What is the maximum amount of cut recommended for a thickness planer.
a. 3 mm (1/8 inch)
b. 6 mm (1/4 inch)
c. 9 mm (3/8 inch)
d. 13 mm (1/2 inch)
4. What should be done when attempting to plane thin stock?
a. nothing the planer will plane it safely
b. double it up to make it thicker
c. it should be properly supported by a jig or back up board
d. you should never plane thin pieces
5. Which of the following statements are true?
a. Operate only with instructor’s permission and after you have received instruction.
b. Remove jewellery, eliminate loose clothing and confine long hair.
c. Make sure all guards are in place and operating properly.
d. all of the above
6. What should the user do when feeding stock into the planer?
a. feed the stock by hand and force it into the machine
b. not force stock through the planer, guide the material and let the power feed operate
c. keep pressure on the stock pushing it into the machine
d. stand directly in front of the machine
7. Which of the following is the correct procedure for planning bowed stock?
a. there is no procedure just run it through as is
b. place the concave (cup clown) side of the stock on the table and cut with the grain to prevent kickback
c. place convex (cup up) side of the stock on the table and cut against the grain to prevent kickback
d. push it through as best you can and hold it tight with your hands
8. What are the proper depth of cut and rate of speed related to?
a. the ability of the operator
b. the material being planed
c. the time available
d. none of the above
9. When must Personal Protective Equipment be worn?
a. only when asked
b. when the instructor is in the room
c. always
d. never
10. What should the user do before operating the planer? Circle all that apply
a. received instruction
b. passed a tool safety test with 100% grade
c. received permission
d. check that all guards are in place
Jointer Safe Operating Procedures
1. Operate only with instructor’s permission and after you have received instruction.
2. Remove any jewellery, eliminate loose clothing, and confine long hair.
3. Make sure all guards are in place and operating correctly.
4. Always use proper eye and hearing protection.
5. All materials should be inspected for defects such as warps, knots and foreign objects.
6. Make all adjustments with the power supply to the Jointer turned off.
7. Before operating the jointer, make sure the cutter safety guard is in full and proper operation and ensure the fence is locked in the correct location.
8. Before starting the jointer ensure that table is cleared of objects, the stock is not in contact with the cutter heads and tighten the infeed and outfeed tables.
9. Never joint or plane a piece of stock that is shorter than 250 mm (10″), narrower than 19 mm (3/4″), or less than 13 mm (1/2″) thick.
10. The maximum depth of cut is 3 mm (1/8″).
11. Always joint wood stock with the grain.
12. After making the correct depth of cut adjustment to the infeed table make sure the table is locked.
13. Stock should be fed into the jointer from the infeed side only. The rotation of the cutter heads would make any other operation dangerous.
14. Use an appropriate push stick or safety blocks whenever fingers are expected to pass within 50 mm (2″) of the cutters.
Jointer Safety Test
Name:________________________________ Date:_______________________________
Instructions: Circle the letter next to the most correct answer
1. When can a student operate a jointer?
a. after they have received instruction
b. after they have removed any jewellery
c. once they have eliminated or confined loose clothing and confined long hair
d. all of the above
2. Which direction should wood stock be jointed:
a. against the grain
b. sideways to the grain
c. with the grain
d. all of the above
3. What should you do when you approach the jointer? Circle all that apply
a. take a comfortable stance with your feet about shoulder width apart
b. make sure the cutter safety guard is in full and proper operation
c. ensure the fence is locked in the correct location
d. have received instructor permission
4. What is the maximum depth of cut on a jointer?
a. 19 mm (3/4″)
b. 9 mm (3/8″)
c. 3 mm (1/8″)
d. 25 mm (l “)
5. What is the minimum length of work piece that can be safely used on a jointer?
a. 250 mm (10″)
b. 125 mm (5″)
c. 300 mm (12″)
d. 600 mm (24″)
6. What should you do before starting the jointer?
a. make sure the guard is in place and is operational
b. leave objects on the table (tools, scraps of wood etc.)
c. loosen the in feed and out feed tables
d. all of the above
7. Which one of the following statements is true?
a. The workpiece should contact the cutter before the jointer is turned on.
b. Feed the work piece into the out-feed end of the machine.
c. It is okay to feed a work piece that is warped, contains knots, or is embedded with foreign objects (such as nails).
d. Never perform “free hand” operations, always have the fence in proper position to guide the workpiece.
8. What is an important procedure when using the jointer?
a. apply pressure to the in-feed table only
b. apply pressure to the out-feed table only
c. apply even constant pressure to both the in feed and transfer to the out-feed table as the stock is being jointed
d. none of the above
9. Which of the following statements are true? Circle all that apply
a. Operate only with instructor’s permission and after you have received instruction.
b. Remove jewellery, eliminate loose clothing and confine long hair.
c. Make sure all guards are in place and operating properly.
d. A safety test on the tool has been passed at 100% level
10. What is the minimum distance your finger should be away from the cutters before you use an appropriate push stick or safety blocks?
a. 50 mm (2″)
b. I 00 mm (4″)
c. 150 mm (6″)
d. 200 mm (8″)
Drill Press Safe Operating Procedure
1. Operate only after you have received instruction.
2. Remove jewellery, eliminate loose clothing, and confine long hair.
3. Make sure all guards are in place and operating properly.
4. Always use proper Personal Protective Equipment (PPE’s). ie eye protection
5. All materials should be inspected for defects such as warps, knots and foreign objects.
6. Do not wear gloves.
7. The belt guard should always be in place.
8. Clamp work to the table and long stock should be placed to the left to avoid being struck by the material if a jam occurs.
9. Make sure the chuck key is removed from the chuck before starting.
10. Make all adjustments with the power off and machine unplugged.
11. Adjust the table depth stop to avoid drilling into the table.
12. Never perform setup or layout work on the table.
13. Make sure that the drill bit or cutting tool is secure in the chuck and in good condition.
14. Use the recommended speed for the material you are drilling. (the harder the material the slower the speed).
15. When finished shut off power, remove drill bit or cutting tool and clean up debris.
Drill Press Safety Test
Name:_____________________________ Date:______________________________
Instructions: Circle the letter next to the most correct answer
1. What must you do before using the drill press? Circle all that apply
a. wear Personal Protective Equipment
b. confine long hair
c. remove jewellery
d. ask permission from
2. Long stock should be held on which side of the drill press?
a. left
b. right
c. front
d. back
3. What should you do when operating a drill press?
a. leave the key in the chuck
b. leave the machine running unattended
c. never use drill bits and sanding drums that are damaged
d. all of the above.
4. How should stock be secured when using the drill press?
a. not fastened at all
b. held at an angle with your hands
c. secured in a safe manner (clamps etc.)
d. none of the above
5. What should have occurred before you use the drill press?
a. passed the safety test
b. followed all safety procedures
c. signed off to use machine
d. all of the above.
6. Which statement is false for the safe operation of the drill press?
a. Use recommended speeds for all operations.
b. Tighten all lock handles.
c. Properly lock the bit in the chuck.
d. Turn the machine on when changing a drill bit.
7. Which statement is true for the safe operation of the drill press?
a. Adjust the table depth stop to avoid drilling into the table.
b. Change the speed without asking for permission.
c. Make adjustments with the machine still running.
d. Remove stock when drill bit is still turning.
8. What is the correct shut down procedure for the drill press?
a. shut off power, remove the drill bit or cutting tool, and remove debris from the table
b. turn machine off, leave it plugged in and do not remove drill bit or cutting tool
c. turn off machine, unplug, and leave key in the chuck
d. none of the above
9. For what is the table depth stop used?
a. to adjust the drill bit
b. to avoid drilling into the table
c. to tighten the drill bit
d. to align the table top
10. What is the rule when choosing the correct speed to drill different materials?
a. the harder the material the slower the speed
b. the harder the material the faster the speed
c. the softer the material the slower the speed
d. it doesn’t matter
Compressor/Pneumatic Nailer Safe Operating Procedures
1. Always use safety glasses to prevent eye injuries. The tool operator and all persons in the work area must wear safety glasses.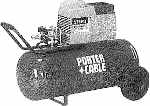
2. Always operate the compressor in a well-ventilated area free of combustible materials or vapors.
3. Maintenance should only be done with the power disconnected.
4. Operate compressor at least 12 inches from a wall or obstruction
5. Connect the air tool to air supply hose with a coupling that removes all pressure from the tool when the coupling is disconnected.
6. Disconnect tool from air supply hose before doing tool maintenance, clearing a jammed fastener, leaving work area, moving tool to another location or handing tool to another person.
7. Remove finger from trigger when not driving fasteners. Never carry tool with finger on trigger… tool may fire if safety is bumped while trigger is depressed.
8. Do not fire fasteners close to the edge of the work piece. The work piece could split & the fastener could fly free or ricochet causing personal injury.
9. Do not drive fastener on top of another fastener or with tool on too steep an angle.
1 0. Do not restrict ventilation openings as it will cause serious overheating and could cause fire
11. The air tank must be drained daily.
12. Never touch any exposed metal parts on a compressor during or immediately after operation. Compressors will remain hot for a period of time after use.
13. Before use, ensure that tank is at correct/recommended operating pressure.
14. Do not blow compressed air at anyone as the air stream can cause soft tissue damage to exposed skin and can propel dirt, chips, loose particles at high speed.
Compressor/ Pneumatic Nailer Safety Test
Name:___________________________ Date:_______________________
Instructions: Circle the letter next to the most correct answer
1. Which piece of safety equipment must be worn when using the air compressor unit?
a. steel toe boots
b. hard hat
c. eye protection
d. apron
2. When using the compressor, which are considered safe practices?
a. Disconnect tool from air supply hose before doing tool maintenance.
b. Disconnect tool from air supply before loading fasteners.
c. Connect air tool) to air supply hose with a coupling that removes all pressure from the tool when the coupling is connected.
d. All of the above.
3. Which is the minimum distance the compressor should be from a wall or obstruction when in use?
a. 1 inch
b. 12 inches
c. 12 feet
d. none of the above
4. When should the air tank should be drained?
a. hourly
b. daily
c. weekly
d. never
5. What could happen if the ventilation openings are covered or restricted?
a. The compressor could overheat and possibly catch fire.
b. The compressor will run too cool.
c. The back up ventilation openings would engage.
d. all of the above.
6. What should you do before using the air compressor?
a. remove safety glasses
b. increase air pressure without asking the teacher
c. fire a nail to see if it is working
d. read s.o.p
7. Why should you never touch exposed metal parts of the compressor after it has been used?
a. hot
b. cold
c. sharp
d. all of the above
8. Which of the following is a good practice when using the compressor?
a. Never point the tool or the compressed air stream at another person.
b. Engage in horseplay.
c. Pull the compressor by the hose or cord.
d. All of the above.
9. What should you do before using the air compressor?
a. ensure the tank is empty
b. the compressor is not plugged in
c. ensure the tank is at the recommended operating pressure
d. all of the above
10 Which of the following should you do before completing maintenance on an air compressor?
a. obtain permission from instructor
b. keep pressure up on the tank and hose
c. make sure the compressor is plugged in
d. all of the above
Biscuit Joiner Safe Operating Procedures
1. Always wear appropriate Personal Protective Equipment (PPE).
2. Confine any Jong hair, secure loose clothing and remove jewellery.
3. Avoid accidental starting. Be sure switch is off before plugging in.
4. Do not carry tool with your finger on the trigger.
5. Remove the power cord when changing the blade or performing regular maintenance.
6. Remove any adjusting keys or wrenches before turning power on.
7. A joiner ejects dust and wood chips at a high rate of speed, keep your face away from the chute and wear safety glasses. If equipped, ensure dust collection bag is in place.
8. Do not overreach. Keep proper footing and balance at all times.
9. Use clamps or other practical ways to secure the work piece.
10. Make sure the blades are sharp.
11. Check the operation of the guards before using the tool.
12. Do not disable any anti-kickback points on the faceplate. Make sure they are engaged in the work piece.
13. Keep hands away from blade when cutting.
14. Never hold the work piece in your hand.
15. After cut, retract the blade fully and wait for it to stop.
Biscuit Joiner Safety Test
Name:_____________________________ Date:_____________________________
Instructions: Circle the letter next to the most correct answer
I. When should eye and ear protection be worn while using the biscuit joiner?
a. always
b. most of the time
c. some of the time
d. never
2. What must you do before using the biscuit joiner?
a. check the tool for defects
b. have received safety instruction
c. have the instructor’s permission
d. all of the above
3. Which of the following is correct when using the biscuit joiner?
a. carry tool with finger on trigger
b. make all adjustments with tool plugged in.
c. switch if in the OFF position before plugging in.
d. all of the above
4. What must be in place when using the biscuit joiner? Circle all that apply.
a. dust bag
b. fence
c. handle
d. personal protective equipment
5. What should be done with the stock when using a biscuit joiner?
a. must be at least 18″ long
b. must be held in your hand
c. must be clamped in a suitable manner
d. all of the above
Circular Saw Safe Operation Procedures

1. Operate only after you have received instruction.
2. Remove jewellery, secure loose clothing, and confine long hair.
3. Make sure all guards are in place and operating properly.
4. Always use proper eye protection.
5. All materials should be inspected for defects such as warps, knots and foreign objects.
6. Avoid accidental stalling. Be sure switch is off before plugging in.
7. Do not carry tool with your finger on the trigger.
8. Remove the power cord when changing the blade or performing regular maintenance.
9. Remove any adjusting keys or wrenches before turning power on.
10. Keep your body to the left side of the blade, never in line with the saw blade just in case of kickback. Maintain a firm grip with both hands on the saw to allow you to resist kickback forces.
11. Keep your hands away from the cutting area and blade.
12. Always cut in a straight line.
13. Never reach underneath the piece of work.
14. Never operate a circular saw over your head.
15. Start a circular saw with the shoe in contact with the stock, but the blade clear of the stock.
16. Check the lower guard for proper closing before each use.
17. Always clamp the work piece to a bench or saw horse. Never hold the piece being cut with your hands or across your legs.
18. When blade binds, or when interrupting a cut for any reason, release the trigger and hold the saw motionless in the material until the blade comes to a complete stop. Never attempt to remove the saw from the material or pull it back while the blade is in motion.
19. Always work with a sharp blade. Never use dull or damaged blades.
20. Always ensure you know where your power cord is in relation to your saw.
21. The weight of your saw should always be on the clamped side of your stock.
Circular Saw Safety Test
Name:____________________________ Date:__________________________
1. What should you do before using the circular saw? Circle all that apply
a. pass the safety test
b. follow all safety procedures
c. receive demonstration
d. be signed off to use
2. What should you look for when inspecting stock?
a. loose knots
b. scratches
c. pencil marks
d. all of the above
3. Why should you stand on the left side of the circular saw and not in line with the blade when cutting?
a. so you can cut along the grain of the wood
b. to avoid kickback of the stock
c. so the blade stays sharp
d. none of the above
4. What should you do before using the circular saw?
a. remove jewellery
b. confine long hair
c. secure loose clothing
d. all of the above
5. When cutting with the circular saw where should you place your hands?
a. on the cutting line
b. below the piece of stock
c. holding the piece of stock
d. holding the saw firmly with both hands
6. Which of the following describes a correct circular saw operating procedure?
Circle all that apply
a. ensuring cuts are not made overhead
b. ensuring that the saw is not started above the stock
c. ensuring that power is disconnected before changing blade
d. ensuring that the guard is out of the way when you start
7. Which of the following describes a proper use for the circular saw?
a. using it to make curved cuts
b. using it to make straight cuts
c. using it for overhead cuts
d. using it to cut materials that are not properly clamped or secured
8. What should you do when using the circular saw?
a. hold down the stock with your hand while cutting
b. lay the stock across your leg while cutting
c. clamp your stock before cutting
d. none of the above
9. What do you do if the saw blade binds while making a cut?
a. release the trigger and wait until the blade comes to a complete stop before removing it from the material
b. remove the saw immediately to help avoid kick back
c. back saw out of cut
d. shake stock vigorously until blade comes free
10. What should you ensure before starting a cut?
a. that the saw blade is dull and may be missing teeth
b. that the guard is up and out of the way
c. that your stock is not secured or clamped
d. that you know where your power cord is in relation to your saw
Band Saw Safe Operating Procedure
1. Operate after you have received instruction.
2. Remove jewellery, secure loose clothing, and confine long hair.
3. Always use personal protective equipment (PPE) proper eye protection.
4. All materials should be inspected for defects such as warps, knots and foreign objects.
5. Keep safety guards in place. Upper guide should clear stock by about 6 mm (1/4″).
6. Always check the condition of the blade (missing teeth, Sharpness, Kinks and tension).
7. Make curved cuts gradually and use relief cuts for tight radius curves.
8. Never back out of curved cuts while machine is still running as this will result in the blade coming off. (You must wait until blade comes to a complete stop).
9. Make all cuts on the waste-side of the line.
10. Always keep your hands on the sides of the blade while operating…. never in front of blade!
11. Maintain a well-balanced position and feed work into blade firmly, but without pushing too hard.
12. Never start the machine with stock touching blade, never reach under the table, and never perform layout or setup on the table.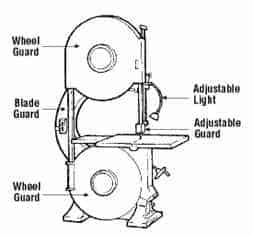
13. Turn machine off and disconnect from power source before installing or removing accessories, when finished cutting, before adjusting or changing set-ups, or when making repairs.
14. If blade breaks during operation immediately stop the saw, and report in book.
Band Saw Safety Test
Name:_________________________________ Date:___________________________
Instructions: Circle the letter next to the most correct answer
1. When is personal protective equipment (PPE) required to operate the band saw?
a. never
b. sometimes
c. always
d. most of the time
2. Which of the following are safe operating procedures for a band saw?
a. keep guard in place
b. keep well-balanced
c. all of the above
3. How far should the safety guard be above the stock?
a. 13 mm (1/2″)
b. 19 mm (3/4″)
c. 6 mm (1/4″)
d. 25 mm (l “)

4. What should you always use when making tight cuts on curves?
a. relief cuts
b. reverse cuts
c. circular cuts
d. radius cuts
5. Which side of the line should you always make cuts on?
a. right
b. left
c. waste
d. none of the above
6. Where your hands should be placed when using the band saw?
a. in front of the blade
b. behind the blade
c. on the sides of the blade
d. touching the blade
7. What should you do if the blade breaks while operating the band saw?
a. Remove your piece of stock from the machine.
b. complete your cut
c. Stop the machine, don’t remove your stock, and report to the teacher.
d. Remove the blade.
8. What should you do before operating the band saw?
a. Receive instructional demonstration.
b. Read S.O.P
c. Follow proper safety procedures (eye protection, confine long hair, etc….)
d. all of the above
9. Which of the following are common safe practices for operating a band saw?
a. Hold work piece with one hand.
b. Leave the machine running when not in use.
c. Tum machine off when finished.
d. Perform layout operations or setup work on the table /work area when machine is running.
Bench Grinder Safe Operating Procedure

1. Operate only with the instructor’s permission and after you have received instruction.
2. Remove jewellery, eliminate loose clothing, and confine long hair.
3. Make sure all guards are in place and operating properly.
4. Work area should be prepared for safe operation. (Flammables, etc)
5. Always use proper personal protective equipment (face shield should be used).
6. All materials should be inspected for defects such as warps, knots and foreign objects.
7. Make all adjustments with the power off and machine unplugged.
8. Tool rests must be adjusted to within 3 mm (1/8”) of the grinding wheel.
9. Spark deflectors must be adjusted to within 3 mm (1/8”) of the grinding wheels.
10. Do not grind on the side of the grinding wheels. Only the face of the wheel must be used.
11. Stand to one side when starting the machine.
12. Immediately report to instructor when grinding wheels are excessively small or have become cracked.
13. Small work pieces should be held with locking pliers.
14. Do not leave the machine until the grinding wheels have come to a full stop.
15. Grinding materials generate a lot of heat, be careful as it may cause a burn.
16. Clean up workspace.
Bench Top Grinder Safety Test
Name:______________________________ Date:_________________________
Instructions: Circle the letter next to the most correct answer
1. During use of a bench top grinder, when must Personal Protective Equipment (PPE’s) be worn?
a. only when working with metal
b. never
c. always
d. only when working with plastic
2. What checks are required for the grinding wheels on a bench top grinder?
a. To make sure they are suitable for the speed of the machine.
b. That they have a bore exactly equal to the arbors of the machine.
c. That they do no vibrate.
d. All of the above.
3. The grinding wheel must be inspected regularly for unusual wear. What do you do if defects are noticed?
a. ignore them
b. clean around the edges
c. replace them
d. use at reduced speed
4. What should be done with the tool rests on the grinder?
a. loosened before use
b. move till they are touching the grinding wheels
c. placed 3 mm (1/8 “) from grinding wheel and tightened securely
d. ignored, they are of no use
5. What should the user do when starting a job on the grinder? Circle all that apply.
a. stand to one side before turning the machine “ON”
b. complete a visual inspection to ensure safe operation
c. keep the workpiece away from the grinding wheel
d. inspect material for defects
6. What must have occurred before operating the bench top grinder?
a. instruction received
b. passed a tool safety test with 100% grade
c. permission received
d. all of the above
7. What must be used when grinding small pieces of material?
a. locking pliers
b. c-clamp
c. hammer
d. chisel
8. After grinding is completed, what must you ensure is true about the material before handling?
a. That it is cool to the touch.
b. That it is too hot to handle.
c. That it is left touching the grinding wheel.
d. That the grinding wheel is left on.
9. Which part of the grinding wheel should be used to ensure the safe operation of a bench grinder?
a. left side
b. right side
c. the face (front)
d. does not matter
10. What must the user ensure upon completion of the grinding job?
a. That the machine is turned off and the grinding wheel has come to a complete stop.
b. That they have their ground material secured.
c. That the tool rests are loosened.
d. All of the above.
Cordless/Corded Hand Drill Safe Operating Procedures
1. Operate only with instructor’s permission and after you have received instruction.
2. Remove any jewellery, secure loose clothing, and confine long hair.
3. Always use proper eye protection.
4. All materials should be inspected for defects such as warps, knots and foreign objects.
5. Before using a powered hand tool insure that the work area has been inspected for workplace hazards (e.g. water hazards, aluminum ladders)
6. Hold tool by insulated gripping surfaces when performing an operation where the tool may contact hidden wiring. Contact with a “live” wire will also make exposed metal parts of the tool “live” and shock the operator.
7. Stock being bored should be secured to a work bench or other structure.
8. Never use excessive force on the power tool.
9. Use proper bit for proper material. (Masonry vs wood vs metal)
10. Do not use the power tool if the switch does not turn it on and off.
11. Disconnect the plug from the power source and /or the battery pack from the power tool before making any adjustments, changing accessories or storing power tools.
12. Maintain power tools. Check for misalignment or binding of moving parts, breakage of parts and any other condition that may affect the power tool’s operation.
13. Use the power tool, accessories and tool bits etc., in accordance with these instructions and in the manner intended.
14. Do not abuse the cord. Never use the cord for carrying, pulling, or unplugging the power tool.
15. Remove any adjusting key or wrench before turning the power tool on.
16. Do not overreach. Keep proper footing and balance at all times.
17. Wear ear protectors with impact drills. Exposure to noise can cause hearing loss.
18. Use auxiliary handles supplied with the tool. Loss of control can cause personal injury
19. Any damage to the battery pack should be reported to the instructor immediately.
20. Do use power from the drill to tighten keyless chucks. Hand tighten only.
Cordless/Cord Hand drill Safety Test
Name:__________________________ Date:____________________
Instructions: Circle the letter next to the most correct answer
1. What must you do before using the hand drill?
a. wear Personal Protective Equipment
b. confine long hair
c. remove jewellery
d. all of the above
2. When is operating the hand drill permissible? Circle all that apply
a. the work area is inspected for hazards
b. a safety test is passed at 100%
c. permission has been obtained from the instructor
d. a demonstration has been received from the instructor
3. What must the user ensure while using the hand drill?
a. The tool is not excessively forced into the stock being worked on.
b. The tool is carried with finger on the trigger.
c. The power plug is pulled out using the cord.
d. The handles supplied with the tool are not used.
4. When changing the bits or performing any other maintenance on the hand drill, what must you do?
a. leave the tool plugged in
b. turn off the tool and disconnect it from the power source/battery pack
c. grasp the chuck with your hand and press the trigger to loosen the bit
d. all of the above
5. Why is it important to hold power tools by insulated gripping surfaces when performing an operation?
a. may strike hidden wiring
b. may strike cold or hot materials
c. may strike a nail, screw, knot, etc.
d. none of the above
Palm Sander Safe Operating Procedures
1. Operate only with instructor’s permission and after you have received instruction.
2. Remove any jewellery, eliminate loose clothing, and confine long hair.
3. Make sure all guards are in place and operating correctly.
4. Always use proper eye protection and a dust mask as dust particles can irritate the eye s and lungs.
5. All materials should be inspected for defects such as warps, knots and foreign objects (nails, screws, etc). If sanded it is possible that such objects may become projectiles risking damage to the sander or to the user.
6. Do not use sandpaper that is larger than needed. Extra paper that extends beyond the sanding pad can cause serious lacerations.
7. Never operate this tool with perforated paper unless the dust collection bag is in place. The perforations allow dust to be transferred to the dust collection bag.
8. Never use the sander for wet sanding. Using this tool for this purpose could cause electric shock.
9. Sanding of lead-based paint is not recommended due to the difficulty of controlling the contaminated dust. This is covered under the hazardous material handling documents of WHMIS.
10. Empty the dust collection bag regularly. It is especially important when sanding resin coated surfaces such as polyurethane, varnish, shellac, etc. as the residue from such compounds can spontaneously combust if left in the collection bag.
11. A dust mask or respirator should be worn by all persons entering the work area.
12. All surfaces in the work area should be vacuumed and thoroughly cleaned daily for the duration of the project.
13. Keep your machine as clean as possible by wiping with a clean cloth and blowing through it with air every 5 hours of use.
14. Do not operate the sander for extended periods of time as the vibrations can cause nerve damage to fingers, hands and arms.
Palm Sander Safety Test
Name:_________________________ Date:___________________
Instructions: Circle the letter next to the most correct answer
1. When should permission be obtained from your instructor to operate the palm sander?
a. in all situations
b. never
c. when sanding lead paint
d. when the stock to be sanded is small
2. What is included in the proper dress when operating a palm sander?
a. no jewellery
b. no loose clothing
c. confined long hair
d. all of the above
3. When must proper eye protection be worn to operate the palm sander?
a. when sanding hardwood
b. when sanding softwood
c. always
d. never
4. The sander can be used with paper that has been perforated by the paper punch. Why are perforations (holes) made in the paper?
a. to allow for more vigorous sanding
b. to allow for better dusk collection
c. to ensure that the paper does not fall off
d. to save paper
5. Which of the following surfaces are not recommended to be sanded with the palm sander because it may create contaminated dust?
a. pine
b. maple
c. lead
d. birch
6. Why must the dust bag be emptied regularly especially when sanding resin coated surfaces such as polyurethane, varnish, shellac, etc.?
a. it uses more electricity
b. sand paper loses its grittiness
c. the residues from such compounds may self ignite and cause fire
d. none of the above
7. Why must the user ensure that the surface being sanded is free of nails, screws and other metal pieces?
a. lead contained in nails or screws is a contaminant
b. metal shards could break off and become a projectile
c. so that the operator doesn’t need to wear safety glasses
d. metal pieces will make your stock look bad
8. Why should the sander only be operated for short periods of time?
a. it draws too much power
b. it is too noisy
c. vibration caused by the operating action of this tool may cause permanent injury to fingers, hands and arms
d. you will use too much sandpaper
9. Why is it important that the user wear Personal Protective Equipment (PPE) when using the palm sander?
a. dust particles from sanding can irritate eyes and lungs
b. the sander is not noisy
c. the sander does not produce any dust
d. all of the above
10. What must you do before connecting the sander to the power source? Choose all that apply.
a. ensure that the power button is in the off position
b. ensure that sand paper is secured properly to the sanding pad with attached clamps
c. ensure that the dust collection system is connected
d. ensure that the power cord is not frayed or damaged
Router Safety Operating Procedures
1. Operate only with instructor’s permission and after you have received instruction.
2. Remove any jewellery, eliminate loose clothing, and confine long hair.
3. Make sure all guards are in place and operating correctly.
4. Always use proper eye and hearing protection.
5. All materials should be inspected for defects such as warps, knots and foreign objects.
6. Check you bit frequently to ensure safe operation. Be careful the bit could be hot!
7. Make all bit changes and adjustments with the power supply to the router disconnected.
8. When changing a bit in a router, before beginning operations:
◦ Be sure the bit is inserted a minimum of 15mm (5/8”) and the collet chuck is tight and secure.
◦ Rotate the spindle completely by hand to ensure bit is seated
9. Make sure the work piece is securely fastened and the travel area of the router is free of any obstructions. When routing edges using a pilot guide you route in a counter- clockwise direction.
10. Make a trial cut in a similar piece of stock first.
11. Remember this rule of thumb: harder the material the slower the speed
12. Make sure the switch is in the off position before plugging into the power source.
13. Carefully hold the router firmly with both hands and apply constant cutting pressure. Do not force or jam the cutting bit into the work piece. Guide the router slowly through the stock and let the machine do its work.
14. When finished, move the cutter away from the stock, turn off the router and wait for it to come to a complete stop before laying the tool down.
15. Unplug the router before commencing cleanup procedures.
This addendum deals specifically with Safe Operation of a Router Table.
◦ Move work piece from right to left.
◦ Feed at steady rate without stopping.
◦ To avoid rough and chipped surfaces make several passes for deep cuts.
◦ Use push sticks to keep your fingers away from the bit.
◦ Never position the work piece between the fence and the bit.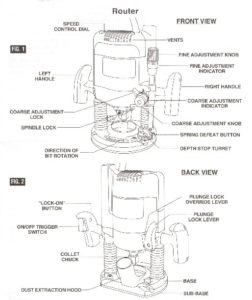
Router Safety Test
Name:_____________________________ Date:_____________________________
Instructions: Circle the letter next to the most correct answer
1. When should permission be obtained from your instructor to operate the router?
a. always
b. never
c. sometimes
d. when the stock to be routed is large
2. Which are included in the proper dress for operating a router?
a. no jewellery
b. no loose clothing
c. confine long hair
d. all of the above
3. When must Personal Protective Equipment (PPE) must be worn to operate the router?
a. sometimes
b. never
c. always
d. all of the above
4. What must you do when changing the bit or performing any other maintenance on the router?
a. turn off the machine
b. turn off the machine and disconnect the machine from the power source
c. doesn’t matter because the bits are small anyway
d. keep the safety guard in place
5. What should you do after changing the bit on the Router? Circle all that apply
a. rotate the spindle completely by hand before turning on the machine
b. be sure the switch is in the off position before inserting the plug into the outlet
c. ensure that the collett chuck is tight and secure
d. remove the wrench from the collett before inserting the plug into the outlet
6. What is considered safe practice when cutting stock on the router?
a. start on your piece of stock right away
b. hold onto the router firmly with both hands
c. use only one hand so you can hold the stock with the other
d. none of the above
7. What should you do when cutting stock on the router?
a. turn the machine on and off several times to get rid of the off cuts
b. force the stock into the blade to slow down the motor
c. guide the router slowly through the stock and let the machine do its work
d. place your stock on the table with the cut line down towards the table so that you will not cut off the line
8. Which of the following are safe practices when cutting stock on the router? Circle all that apply
a. make sure the work piece is clamped securely to the table
b. when routing edges using a pilot guide you route in an counter- clockwise direction
c. make sure the cutting area under the work piece is free of any obstruction d. use an old dull bit
9. What rule should you use when choosing the correct speed for cutting stock on the router?
a. the harder the material the slower the speed
b. the harder the material the faster the speed
c. the softer the material the slower the speed
d. doesn’t matter because the stock will be held tightly to the table
10. What should you do when finished routing?
a. lay the router down on the workbench
b. move the cutter away from your stock and wait for the bit to come to a complete stop before laying the tool on the workbench
c. continue to hold the cutter firmly against the work piece until it stops
d. leave the switch in the locked-on position
Scroll Saw Safe Operating Procedures
1. Operate only with instructor’s permission and after you have received instruction.
2. Remove any jewellery, eliminate loose clothing, and confine long hair.
3. Make sure all guards are in place and operating correctly.
4. Always use personal protective equipment (PPE).
5. All materials should be inspected for defects such as warps, knots and foreign objects.
6. Make all blade changes and adjustments with the power supply to the saw disconnected.
7. After changing the blades you must ensure that the machine rotates freely by rotating it by hand with the machine unplugged form the power source.
8. Choose the correct blade type and speed for the specific material and the smallest radius being cut. Use thin blades and relief cuts for tight radius cuts.
9. The blade should be held firmly in the chucks, be square to the table, and be properly supported by the guide.
10. Be sure the hold down foot is pressing lightly against the work piece.
11. Guide the work slowly through the saw with both hands keeping fingers to the sides of the cut line. Don’t force the stock but rather feed the stock slowly to let the machine do its work.
12. When finished turn off the saw and wait until the blade has come to a complete stop before clean-up.
13. Do not attempt to saw stock that doesn’t have a flat surface unless a suitable support is being used.
Scroll Saw Safety Test
Name Date:
Instructions: Circle the letter next to the most correct answer
1. When should permission be obtained from your instructor to operate the scroll saw?
a. sometimes
b. never
c. always
d. when the stock to be cut is only small
2. What is the proper dress when operating a scroll saw?
a. remove jewellery
b. secure loose clothing
c. confine long hair
d. all of the above
3. When should Personal protective equipment (PPE) must be worn to operate the scroll saw?
a. sometimes
b. never
c. always
d. all of the above
4. What must you do when changing the blade or performing any other maintenance on the scroll saw?
a. turn off the machine
b. turn off the machine and disconnect the machine from the power source
c. doesn’t matter because the blades are only small anyway
d. keep the safety guard in place
5. What should you do after changing the blade on the scroll saw?
a. rotate the machine completely by hand before plugging in the machine
b. turn on the machine to check the tightness of the blade
c. rub the blade with machine oil
d. hold the stock tightly to the table
6. What type of blade should you choose for cutting stock on the scroll saw?\
a. thin for straight cuts
b. thin for tight radius curves
c. wide for tight radius curves
d. wide for all cuts
7. When cutting stock on the scroll saw where should you place your fingers?
a. directly on the cut line
b. ahead of the cutline
c. to the side of the cut line
d. behind the cutline
8. What should you do when cutting stock on the scroll saw?
a. turn the machine on and off several times to get rid of the saw dust
b. force the stock into the blade to slow down the motor
c. guide your work slowly through the stock and let the machine do its work
d. none of the above
9. Where should you place the hold down foot when cutting stock on the scroll saw?
a. ½” (12.5mm) above the work piece.
b. ¼” (6mm) above the work piece
c. 1/8” (3mm) above the work piece
d. lightly against the work piece
10. When can you attempt to saw stock that doesn’t have a flat surface?
a. never
b. when you use a suitable support
c. when you get help from a classmate
d. all of the above
Jigsaw Safe Operations Procedure

1. Operate only with the instructor’s permission and after you have received instruction.
2. Remove jewellery, eliminate loose clothing, and confine long hair.
3. Make sure all guards are in place and operating properly.
4. Always wear safety glasses.
5. All materials should be inspected for defects such as warps, knots and foreign objects.
6. Avoid accidental starting. Be sure switch is off before plugging in.
7. Do not carry tool with your finger on the trigger.
8. Removing adjusting keys or wrenches before turning tool on.
9. Do not overreach. Keep proper footing and balance at all times.
10. Always clamp work piece to the bench or stable platform making sure the bench is clear of the cutting path.
11. Do not force tool. Keep blades sharp and never use dull blades.
12. Should a jigsaw get stuck in a material while cutting, you should stop the saw, unplug it and safely remove the blade. Clean out the kerf and start again.
13. Allow tool to come to a complete stop before withdrawing blade from the kerf. A moving blade may come into contact with the work piece causing a broken blade, damaged work piece, or loss of control and result in injury.
14. Disconnect tool from power source before making any adjustments, changing accessories, or storing tool.
Jigsaw Safety Test
Name:___________________________ Date:__________________
Instructions: Circle the letter next to the most correct answer
1. What should you check before plugging in a jigsaw?
a. that the material for cutting is held freehand
b. the switch is in the off position
c. with your partner about using the saw
d. that the blade is touching the material to be cut
2. Along with having hair tied back and loose clothing secured which of the following should you do when operating a jigsaw?
a. wear ear protection
b. remove jewellery
c. wear eye protection
d. all of the above
3. What should you do when you finish cutting the work piece with the jigsaw?
a. allow tool to come to a complete stop before withdrawing blade from the kerf
b. pull the blade out of the kerf while it is still running
c. leave the saw running on the bench unattended
d. leave the saw plugged in unattended
4. What is the procedure to follow if the saw blade gets stuck while you are making a cut?
a. force the tool
b. lean on the board
c. keep your finger on the trigger
d. stop, unplug it and safely remove the saw
5. How should you hold a work piece when cutting with the jigsaw?
a. hold the work piece with your hands
b. clamp the work piece to the bench
c. get a friend to hold the work piece
d. none of the above
Wood Lathe Safe Operating Procedures

1. Operate only with the instructor’s permission and after you have received instruction.
2. Remove jewellery, eliminate loose clothing, confine long hair and do not wear gloves.
3. Make sure all guards are in place and operating properly.
4. Always use proper Personal Protective Equipment.
5. Always stand on the front of the lathe with the rotation of the stock down towards you.
6. All materials should be inspected for defects such as warps, knots and foreign objects.
7. Stock length and width maximums are determined by operating manual of the specific machine
8. Make all adjustments with the power off and the machine unplugged from the receptacle.
9. Examine workpiece for flaws and test glue joints before mounting.
10. Rough cut workpiece as close as possible to the finished shape before installing it on the faceplate.
11. Securely fasten the stock to the head and tail stock prior to turning and adjust the tool rest so it is as close to the workpiece as possible.
12. Before starting the machine:
1. snug the tailstock centre against the workpiece.
2. adjust the tool rest so it is 3 mm (1/8”) away from the work and 3 mm
(1/8”) above the work centreline, and
3. clear the lathe bed of all objects (tools, scraps of wood, etc..)
13. Never perform layout or assembly, or set-up work on the table/work area when the machine is running.
14. Tighten all clamp locking handles before operating and rotate the workpiece by hand to check clearance before turning on machine.
15. Move the cutting tool into the workpiece slowly and cut small amounts when roughing.
16. When sanding or finishing remove the tool rest.
17. Turn off lathe, wait for the machine to come to a complete stop and clean up workspace
Wood Lathe Safety Test
Name:______________________________ Date:___________________________
Instructions: Circle the letter next to the most correct answer
1. Which of the following statements is true?
a. when using the wood lathe the user should not wear a tie, gloves or loose clothing
b. you can make adjustments to the tail stock while the machine is running
c. the wood lathe is only for softwood
d. the speed of the wood lathe can not be adjusted
2. What should a user consider when selecting a piece of stock to turn on the lathe?
a. not worry to much about stock condition
b. examine the workpiece for flaws and test glue joints before mounting the piece to the machine
c. not worry about the length or width of the stock
d. none of the above
3. What must have occurred before a student operates the Wood Lathe?
a. they received instruction from the teacher
b. they passed a tool safety test with 100% grade
c. they received permission from the teacher
d. all of the above
4. What should the user do before turning on the lathe?
a. choose a piece of stock and sand it to shape
b. loosen head stock and tool rest
c. rotate the workpiece by hand to check clearance
d. nothing, the machine is ready to go
5. What should the user do before installing a work piece on the headstock?
a. rough cut the workpiece as close as possible to the finished shape
b. attach nails as a guide
c. do nothing with the piece, the chisel will fix any problems
d. drill holes in the piece to help secure it
6. What should the user do once the workpiece has been secured in the machine? Choose all that apply
a. start the machine
b. snug the tailstock center against the workpiece
c. adjust the tool rest so it is 3 mm (1/8”) away from the work and 3 mm (1/8”) above the work centerline
d. clear the lathe bed of all objects (tools, scraps of wood, etc.)
7. What is the proper procedure when sanding or finishing a workpiece on the lathe?
a. do nothing, sanding is safe in the regular configuration
b. just use sandpaper and wear gloves
c. remove the tool rest
d. sanding and finishing is not permitted on the lathe
8. What are safe procedures to avoid injury while using the lathe? Choose all that apply
a. stand clear, and keep all observers and passerby clear of the rotating path of the workpiece
b. clear the lathe bed of all objects
c. never perform layout or assembly, or set-up work on the table/work area when the machine is running
d. unplug from the receptacle before making any adjustments on the lathe
9. When is Personal Protective Equipment (PPE) required to operate the lathe?
a. never
b. sometimes
c. always
d. most of the time
10. What should a user do when lathing a piece of stock?
a. stand on the back side of the lathe with the stock rotating up to you
b. move the cutting tool into the workpiece slowly and cut small amounts when roughing stock
c. adjust the lathe speed to maximum regardless of stock
d. remove tool rest and hold chisel just with your hands as you make contact with the stock
All the above information is available in a WORD file or a PDF file that can be downloaded via the buttons below.